Modifications to the
Phantom sails
It is worthwhile making this first check before setting up the
yacht to see if there is an issue with the luff on both the main
and jib. Stretch each sail out on a flat table and tape
each corner out with just a slight tension on each. Lay a
straight edge along the luff of each sail. There should be
a regular convex curve of about 4mm - 6mm for the sail to set
properly. If there is a concave curve or a variable one
then the sail will not set effectively and should be modified to
produce that curve.
Modifying Mainsail Luff
¦¦
Modifying Jib Luff
¦¦
Improving the sail shape
¦¦ RC Yacht Supplies
Modifying the mainsail
My mainsail was a typical example with a concave curve of about
4mm. Needless to say when I had tried to set it on the
mast, it had little shape, the leech would fall off, creases
would appear across the sail and it sailed abominably
To deal with this I decided to replace the folded and sewn
section with hanks as in full sized yachts that travel in the
luff groove with the sail completely outside of the groove.
This would make fitting the sail easier as I found feeding it
down the mast groove a little difficult.
The first step is to undo the stitching ('quickunpick' from my
partners workshop). Then the sail material is laid flat
and carefully stuck down with masking tape so as not to move the
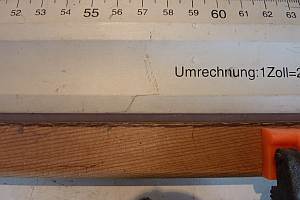
rest of the sail material. A light wooden batten is laid
along the luff and using weights and clamps forced into regular
convex curve. Use a straight edge to check the amount of
curve - about 4mm - 6mm seems about right. It is probably
better to have the maximum part of the curve higher up the sail
say at about 60% of luff height. To ensure the sail area
is not affected the maximum part of the curve was made to touch
the line of stitching. This meant that the curve runs over
the two reinforcing stuck on plastic patches. These need
to be carefully removed along with the eyelets set in them.
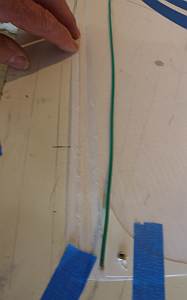

The curve is transferred to the cloth using a fine point
permanent marker. The cloth may then be folded along the
line at this point and stitched back down to reinforce the
leading edge or be reinforced using some Mylar tape and then cut
off. I much prefer the tape method. This tape is
available from RC yacht suppliers in their sail making section.
With the sail still fixed to the table, the tape is
applied to the sail just touching the line or slightly
overlapping it. This is repeated on the other side.
The sail material is trimmed to the line using a
sharp blade cutter and straight edge working a small section at
a time and maintaining the straight edge as close as possible to
the line. Always cut with the straight edge over the material of
the sail and the exposed section is the material to discard.
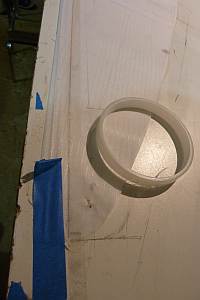
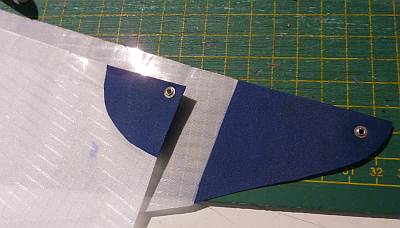
The corners of the sail are reinforced with sticky backed sail
repair cloth. Two layers are necessary making the second
overlap the first by a small amount. Two eyelets are then
set in the reinforced section.
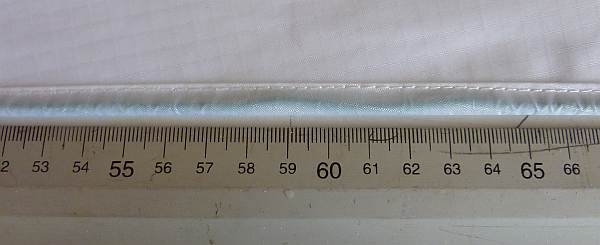
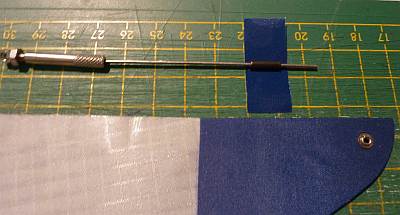
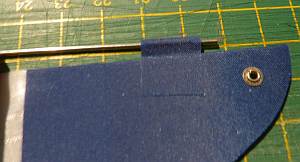
The slides for the mast track are made using a
ferrule from a fishing supply shop (the ones used to secure wire
fishing trace) and a small piece of the sticky sail cloth about
35mm X 12mm. Remove the backing sheet and lay the ferrule
across the middle of the sticky side. Lay the edge of the
sail over one edge so the ferrule remains about 2mm proud.
Let the sail grab the sticky material and holding the ferrule
with a wire fold the other side over the ferrule and onto the
sail. Roll the ferrule between fingers makes a neat finish to
the slide. About 6 or so slides are necessary, one near
the head another near the foot and the rest evenly spread.
Modifying the Jib
If modification is necessary then the jib is treated in much the
same way. Once the ferrules are in place a fine wire or
thread is passed through each to act as a forestay. I
prefer to use a wire forestay and make a channel for it by
sticking a luff tape around the luff using double sided sticky
tape. The materials for this are available from RC yacht
suppliers. This process is outlined on the Stirling site
on this page
http://www.stirling.saradioyachting.org.au/saildesign/finishingsail.htm
near the bottom.
Improving the sail shape
Despite the addition of the luff curve the sail still suffers on
its overall shape. The leech of the mainsail is
particularly difficult to support and not have it fall off and
deliver no drive - just drag. Normally shaped seams
increase the sail area in the middle of the sail effectively
making the leech tight when the clew is tensioned. Try
tensioning your clew and what happens is a diagonal crease from
the leech to somewhere on the mast. The leech cannot be
tightened. One way of dealing with this in a flat panel
sail is to reduce the actual distance along the leech by ever so
slightly crinkling it up with thin tape. Tape the sail on
a flat surface so the leech is held firmly in position.
carefully lay some 4mm sail edging tape from the head to the
clew positioning it right at the edge. Lay the tape with
just a slight amount of tension and firmly press it down.
Releasing the sail and supporting it by the head, tack and clew
should now show the sail to have a curve from the luff to the
leech. If the leech is too tight it will curl in too much.
Simply repeat with less tension with some new tape.
The slight amount of curving at the leech will need to be
removed or flattened with battens so the curl in the sail leech
moves forward to the body of the sail. I recommend at
least 4 battens. I have these about 1/3 of the chord and
fairly rigid (more so than the ones supplied) and available from
the RC yachting suppliers. A taper over their length and a
piece of reinforcing tape over their inner end end helps to
encourage a smooth transition from a straight leech to curved
sail body. You may need to try a few times to get things
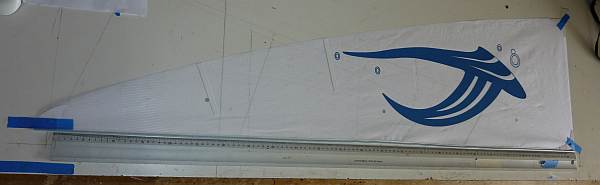
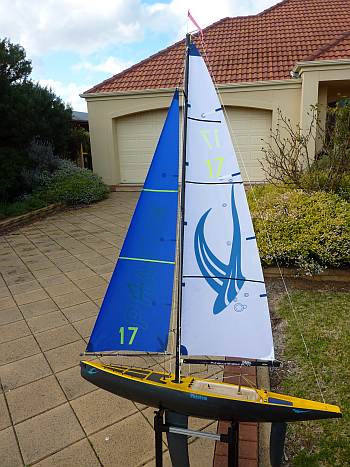
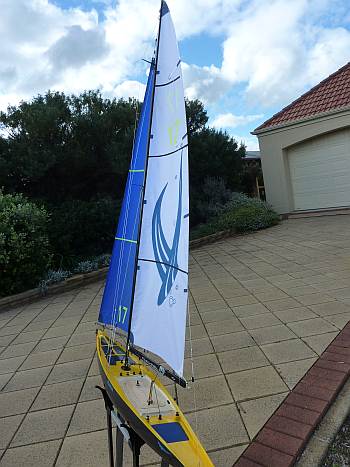
right. look at the images below to see how the sails can
look with this treatment. The black and yellow bands are
there simply to show the curve in the sail and form no function
in generating shape.


RC Yacht supplies
See the left hand column in the links page
under the 'Play the Rules' section, the three most useful
suppliers are listed with links to their address and on-line ordering web sites (click on logo image).
page
last edited on
14/09/2025