Modifications to Waterproof
the Hatch on the
Phantom Yacht
Water proofing the hatch
There
are as many ways to do this as there are yachts!
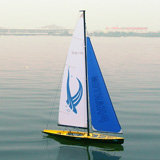
I have glued in
a false lower deck (see it taped in place in the photo) with the
centre section removed then a separate hatch sits on the this
flat surface supported by some flanges glued to the bottom edge.
This way the removable hatch is at the same level as the new sub
deck and taping over the join will seal it quite well. I
also intend to drill a hole in the top deck near the steering
position and seal with a bung or piece of sticky backed sail
cloth to assist draining the water from the hull in the then
unlikely possibility of water getting in - well maybe!
Warren
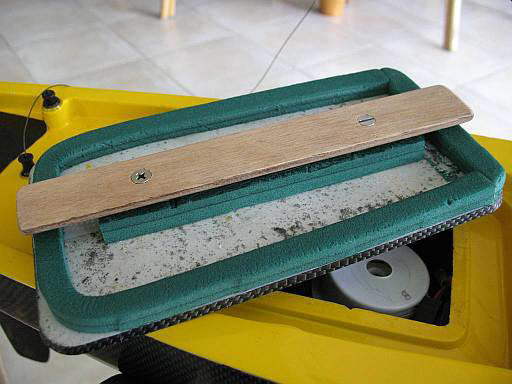
has a method that seems to work involving a solid plank laid
fore and aft over the electrics but under the deck. Two
metal threads secured in this plank are directed up through
holes drilled in the original hatch cover. when tightened from
the top with two wing nuts on the metal threads, the hatch is
pulled down tight and seals well on the foam.
Warren
wrote - Following are the hatch cover mods I made to my Phantom,
I have since then had no ingress of water through this part of
the boat.
Materials used:
1. 10x10mm 500mm long closed cell foam cut from a camping or gym
mat, 2. 30x200mm ~4mm 3 plywood, 3. 2x 3/16x1'' SS countersunk
machine screws with 2x nuts plus 2x wing nuts, 4. 2x 3/16"
rubber O'rings.
Note:
1. Position of first SS screw must allow lower support brace to
clear hatch opening when being installed below the deck, please
check before drilling.
2. Instead of the SS (Stainless Steel) bolts and nuts etc, you
could use nylon.
3. Optional closed cell foam installed between hatch and lower
support brace allows battery wiring to transit without
interfering with the main sheet servo cable.
4. Lightly grease the 3/16" O-ring once installed.


Mal our member from Vic (Bendigo) has shared his method of
sealing the hatch and a few photos from his efforts of sail
making and a couple of shots on the water.
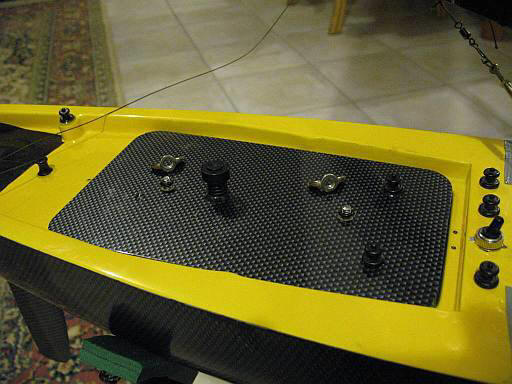
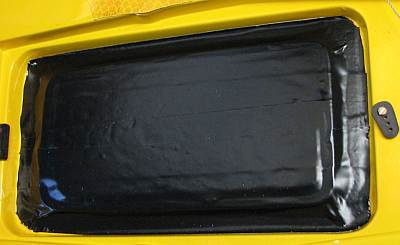
First I removed the totally useless open cell foam from the
hatch cover as well as the double sided tape, leaving clean
white plastic.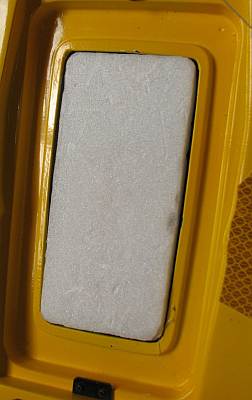
Because I want to leave the hatch sealed the entire day the
waterproof toggle switch and LED is fore of the hatch in place
of 2 decorations.I use a turnigy 9X as a radio and have found
the short antenna works fine, even at great distance on the
water ( from a sailing point of view) if it's fitted inside the
hull around the centreline.To accommodate that and the bare
bones Tx ( no cover, easier to keep dry in case of a mishap) I
mount them under a false hatch insert made from 6mm depron (
only because I have plenty).This fits flush, and tight, in the
hatch opening.Next I prepare 3 strips of 48mm wide Norton pipe
and sealing tape (Bunnings..about $4.50..
 Bit
like duct tape but far less stretchable.. Bit "cushion" like..)
and lay this over the depron and down across the hatch
surrounds.Using a better hatch toggle ( made from large servo
arm) this applies just enough pressure on the hatch so that the
membrane of tape fits pretty well as a gasket under the hatch.
But, the membrane provides a total barrier regardless so it even
works fine without the depron filler.I've had the Phantom out in
all sorts of conditions including a rather wild session 10 days
ago when the wind was going 20 -26 kph gusting to high 30's.. We
add strip lead above the bulb ( I have 1700g ballast (nett) to
bring it up around 1800 -1900g ( plus bulb 63 grams) just to
sail at all in this weather. I know that I should be using storm
sails instead of more weight but that's a little further up the
list.Works for us.. Water is counted in drops these days.. Wish
it were so on all the boats.The beauty of the method is that
it's easy to do and other than removing the foam it doesn't
alter the boat at all.Anyway, most rc sailboaters seem to all be
" I'd rather do it my way" so this is offered only should it be
of any interest to someone, possibly a Phantom owner with water
probs.Oh.. I added a hole near the stern and glued a brass nut
on top to take a brass screw. I'm a compulsive water "checker"..
Too many scars not to be. This way its simple to check after the
boat is tilted aft.
Bit
like duct tape but far less stretchable.. Bit "cushion" like..)
and lay this over the depron and down across the hatch
surrounds.Using a better hatch toggle ( made from large servo
arm) this applies just enough pressure on the hatch so that the
membrane of tape fits pretty well as a gasket under the hatch.
But, the membrane provides a total barrier regardless so it even
works fine without the depron filler.I've had the Phantom out in
all sorts of conditions including a rather wild session 10 days
ago when the wind was going 20 -26 kph gusting to high 30's.. We
add strip lead above the bulb ( I have 1700g ballast (nett) to
bring it up around 1800 -1900g ( plus bulb 63 grams) just to
sail at all in this weather. I know that I should be using storm
sails instead of more weight but that's a little further up the
list.Works for us.. Water is counted in drops these days.. Wish
it were so on all the boats.The beauty of the method is that
it's easy to do and other than removing the foam it doesn't
alter the boat at all.Anyway, most rc sailboaters seem to all be
" I'd rather do it my way" so this is offered only should it be
of any interest to someone, possibly a Phantom owner with water
probs.Oh.. I added a hole near the stern and glued a brass nut
on top to take a brass screw. I'm a compulsive water "checker"..
Too many scars not to be. This way its simple to check after the
boat is tilted aft.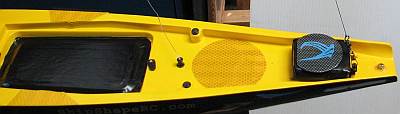 The
battery was a a test of using current weight but move it from
before the servo holder to the stern. Worked and stopped
broaching but made the boat vert twitchy as the bow was just out
of the water at rest. Waves slap seemed to be the problem. It's
since been moved back inside but immediately aft of the servo
holder. Seemed to be nicely balanced Monday going by the ease of
tacking and gybing as well as pointing high.
The
battery was a a test of using current weight but move it from
before the servo holder to the stern. Worked and stopped
broaching but made the boat vert twitchy as the bow was just out
of the water at rest. Waves slap seemed to be the problem. It's
since been moved back inside but immediately aft of the servo
holder. Seemed to be nicely balanced Monday going by the ease of
tacking and gybing as well as pointing high.
Thanks for all your help through the club site,
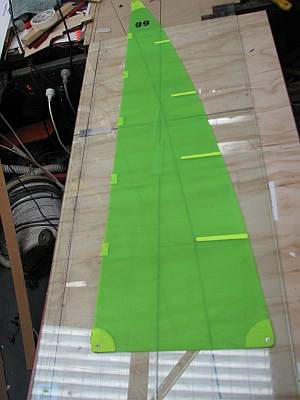 I'm right into sail making now and will send you and update when
I do some more testing.It's light spinnaker rip-stop. Cut with
soldering iron from template.The light wrinkles disappeared
completely while under way. I used your advice of the luff and
battens.A long way to go , yet.
I'm right into sail making now and will send you and update when
I do some more testing.It's light spinnaker rip-stop. Cut with
soldering iron from template.The light wrinkles disappeared
completely while under way. I used your advice of the luff and
battens.A long way to go , yet.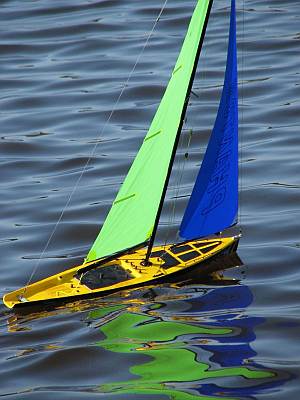

page
last edited on
14/09/2025