Modifications to Radios
While not strictly a modification as such, it is worth looking
at setting up your radio in a fairly standard way to assist you
in the control of your vessel.
-
Use a mode 2 radio.
In mode 2 the the radio is arranged so that the
steering (rudder) is controlled by the right knob and the
''throttle' control which is used for the sail winch is on
the left knob. Almost all radio yacht sailors use a mode 2
radio!
-
Most commonly used movements
When sailing away from you moving the steering knob
(right hand knob) to the right should steer the yacht to the
right. This is the most logical way to steer a vessel
- similar to a car where the movement of the knob equates to
the top of the steering wheel.
Raising the sail control knob (left knob) lets the sails out
and pulling the knob down pulls the sails in. Again
this is the most logical arrangement as a pulling action on
the knob equates to a pulling action on the sails sheets.
95% or more of radio yachts are set up in this way! It
has significant advantages when everyone is the same as
swapping yachts to test sail setting and comparing sail
arrangements between yachts becomes easy without having to
relearn a new set of movements. (Hint: It is good
practice to set up your sail winch/sheets such that the trim
knob for the sail movement is in the full down
position rather in the middle where it is most commonly
placed for other uses. This allows you to have a known
reference spot and your sheets should be adjusted to be
fully in when the main knob is full down.
This makes it easy then to let the sheets out a known amount
as the wind increases without looking at the physical
position of the trim knob as full down is right in and so
many clicks up allows the sheets to be eased.)
While our brain is a wonderful thing and can
learn to cope with any arrangement of movements experience has
shown the above arrangement to be the most easily learned.
What to do if radio is mode 1?
Many simple radios can be swapped from mode 1 to mode 2
by changing the spring and ratchet action in the transmitter.
This does require careful manipulation of the mechanisms with
small springs and screws so work on a clean surface where little
springs can't go too far. If you already have a mode 1
radio and use it for other purposes then buy another radio.
These are incredibly cheap from places like Hobby King etc and
it simply makes no sense not to have a dedicated sailing radio.
What to do if movements are back to
front
If the sails move out when the knob is pulled down or if
the yacht steers to the right when the knob is moved to the left
then the direction has to be reversed. The simplest way to
fix the steering may simply be to swap the arm on the rudder
servo to the opposite side so the connecting rod moves
diagonally to the steering arm on the rudder shaft. If
this is too difficult as the arm may catch on the yacht
structure then the reversal has to be done in the radio
transmitter.
All radios have a process to reverse the motion of each
function. In the simplest radios there is a sliding switch
for each function which reverses the motion. In advanced
radios there is a built in interface where this can be done.
In the computer programmable Hobby King radios, this action
needs changing via a simple computer program while the radio is
connected to the computer. There are quite a few members
who have the cable (cost about $3.00 from Hobby King) and the
programs required are available from the Hobby King web site.
Two small programs are required.
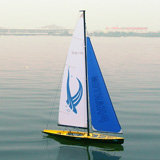
Programming a Hobby King radio (HK-T6A
V2 6 channel radio)
 This
requires the cable and two files from Hobby King to be loaded on
your computer. It assumes a PC with windows XP, Vista or
Win 7 operating system tho I'm not sure if it works on a 64 bit
system. I would suggest you right click the links below
and click on 'Save File As' so files are copied to your
computer. Put them somewhere relevant so you don't lose
them
This
requires the cable and two files from Hobby King to be loaded on
your computer. It assumes a PC with windows XP, Vista or
Win 7 operating system tho I'm not sure if it works on a 64 bit
system. I would suggest you right click the links below
and click on 'Save File As' so files are copied to your
computer. Put them somewhere relevant so you don't lose
them
USB
driver and its
readme file
T6Config program and its
readme file
Having saved them to your computer, run the
USB driver exe file by double clicking it in Windows Explorer.
This will extract the files to a default folder. Now run the
extracted exe file. Read the readme file for reference.
Now extract and run the T6Config program exe file and read the readme file
for reference. This will create a shortcut on the desktop
and certainly within the programs
 Now the USB cable can be plugged in and
connected to the transmitter. Wait while the drivers you
have just loaded are assigned to the USB cable - wait!! it may
take a while. It should have indicated what com port it is
set up for usually com3 or 4. Once
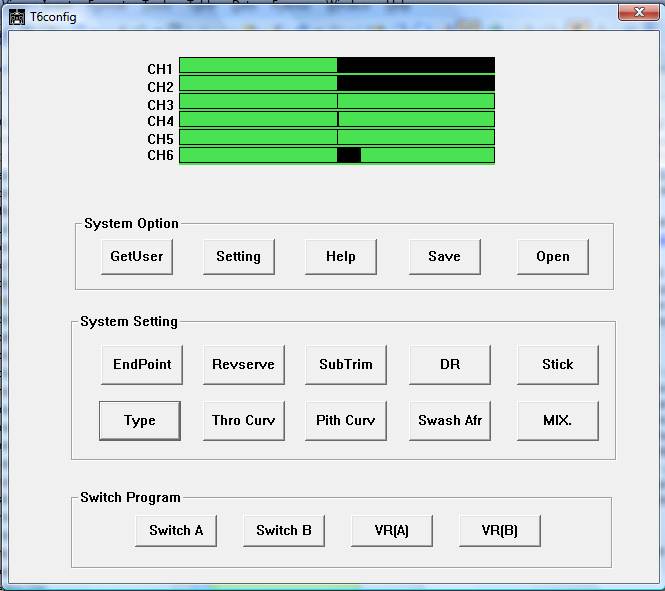
completed, you should turn the transmitter on and open the T6config program.
Now ensure the com port is set to the correct one using the
'setting' button. Click the get user button and wiggle the
sticks on the transmitter. If all is well the black lines
should move corresponding to the various sticks movements.
If no movement occurs then try unplugging the cable from the
computer, turn off the T6config program and reconnect. If
still no joy then check the com port again. If it won't
connect and stay on the correct com port then there may be a
device in your computer causing a conflict - most commonly a
modem. Go into 'device manager' in 'system' found in the
'Control Panel' and disable the modem and try again. If
this fixes the problem then you have the option of leaving it
disabled or disabling it prior to using the T6config program
(after all who uses a modem these days?). Once the program
is working OK then the receiver in your yacht can be turned on
as well and any changes you make in the program are immediately
reflected in the movement of the sails and rudder.
Now the USB cable can be plugged in and
connected to the transmitter. Wait while the drivers you
have just loaded are assigned to the USB cable - wait!! it may
take a while. It should have indicated what com port it is
set up for usually com3 or 4. Once
completed, you should turn the transmitter on and open the T6config program.
Now ensure the com port is set to the correct one using the
'setting' button. Click the get user button and wiggle the
sticks on the transmitter. If all is well the black lines
should move corresponding to the various sticks movements.
If no movement occurs then try unplugging the cable from the
computer, turn off the T6config program and reconnect. If
still no joy then check the com port again. If it won't
connect and stay on the correct com port then there may be a
device in your computer causing a conflict - most commonly a
modem. Go into 'device manager' in 'system' found in the
'Control Panel' and disable the modem and try again. If
this fixes the problem then you have the option of leaving it
disabled or disabling it prior to using the T6config program
(after all who uses a modem these days?). Once the program
is working OK then the receiver in your yacht can be turned on
as well and any changes you make in the program are immediately
reflected in the movement of the sails and rudder.
The servo reversing option is misspelt in the
program as 'Revserve'. Using this option tho, each control
function may be reversed. The other useful buttons are the
End Point and Sub Trim. Its a good idea to open the DR
(dual rates) and set all values to 100 as this negates any
effect the switches might have on the operation of your model
Once you are happy with the settings then its
a good idea to save them using the Save button. You will
be prompted for a file name - I just add a description in front
of what is suggested eg BenPhantom .........
Hope this helps. If not I have the
program set up on my laptop and can fix the radio on a Monday.
Ben Morris
page
last edited on
04/05/2025